Build
Your Own Arcade Controls
 INTERFACE
METHODS
INTERFACE
METHODS
Once
you have the controls you want, how do you connect them to your computer...?
Read on. Be sure also to visit the technical
page for some specific tips!
 Joystick/Game
Port
Joystick/Game
Port
Keyboard
Port - Keyboard Hack
Keyboard
Port - Keyboard Encoder
Keyboard
Port - Other
Keyboard
Ghosting & blocking
Mouse
Port
Other
Parallel/Serial
Ports
USB
Port
Y
Adapters
USB
Port
HAPP
CONTROLS
A new method of interfacing arcade controls
has been added to Happ
Controls' product line. They
have three new interfaces that will connect their arcade controls via USB
port. Being USB compliant, they are plug and play, and offer support
for Win9x, DOS, and iMAC! Be sure to check out the serial
interface also sold by Happ.
Thanks for the info Peter!
GHOST
BUSTING
AmigaZoid sent me some information
to share... He found a Street Fighter II cabinet to hack for his
arcade project. To test things out, he hacked a Microsoft
Natural Elite USB keyboard to wire his controls to. He was
able to hook up two joysticks with 6 buttons each, and so far has seen
no ghosting problems. His keymap can be found here in HTML
or in the original MS-Excel
format. The nice thing is his PS/2 keyboard is still fully functional,
and of course his controller is hot-swappable being that it's USB.
I-PAC
Andy Warne sells a keyboard encoder
type of interface called the I-PAC
(Interface for PC to Arcade Controls). "The I-PAC is a small board
which allows connection of arcade controls such as buttons and joysticks
to a keyboard port on a PC motherboard. It was designed to use inside an
arcade games cabinet with the PC board also mounted inside. It was designed
so that a normal keyboard would only be needed for game loading and configuration,
not for gameplay." It has both a USB and keyboard connector.
It runs $39 plus shipping, which includes
the interface, one cable, and US-AUS currency exchange. Extra interface
cable for I-PAC if required: $5. Only required if you plan to swap interfaces
between USB and keyboard at some time.
LED Harness: Pre-assembled cable including
3 Panel-mounting Caps Lock, Scroll Lock, Num Lock LEDs with conical black
metal bezels. Plugs into I-PAC. $15 (shipping free with board).
Being USB, it also interfaces with
the Mac, and there is a Mac version of the programming software available
as well.
It has some special functionality designed
for emulator support, and is programmable - visit his web
site to read all about it :)
Joystick
Port
Greg
& Craig - One of the easier methods to interface your controls
to your computer is to use the joystick port. The general method used for
this is to purchase a joystick or gamepad with the number of controls you
want to hook up (4 directions, 2 button/4 button/etc). You then gut the
joystick/gamepad, and connect the wires from your own custom controls to
the interface board of the joystick/gamepad. Simple? Yes and no :) Greg
Bendokus and Craig Johnston have an excellent
web
page where they give you a step
by step how-to on doing this. They use a cheap gamepad as an interface,
but their technique could be modified for about any joystick/gamepad you
find. The primary drawback of this technique seems to be a limitation on
the number of buttons available.
Tim
Eckel used and recommends the 3D
ProgramPad from InterAct.
It boasts 10 fire buttons, with 18 programmable functions, and a programmable
8-way digital directional pad. It apparently interfaces with both
the joystick port and the keyboard. The buttons are programmable
with included software, allowing on-the-fly reconfiguration of the controls
for differnt games. Gutting this pad and using it as the basis for
your input seems to offer a lot of flexibility.
Jerky2 used the Microsoft SideWinder
as his joypad to gut. The advantage of this is that there are unused
solder points to connect to, and they are apparently labelled, making it
an easy joypad to hack. Pictures of Jerky's project can be found
here,
here
and here :)
A company called Lead
Pursuit markets a product called the JoySwitch.
This device lets you plug multiple joysticks into your system simultaneously
and switch between them. It's gotten good reviews (see their web
site for links) but will not work with digital joysticks (MS SideWinder,
for instance).
WEB SITE
NO LONGER AVAILABLE! PLEASE EMAIL
IF YOU HAVE ANY INFO!
A company called CH
Products has a similar product called the Joystick
Switchbox. It's another four port adapter that will handle
"all your different peripherals: joysticks, steering wheels, throttles,
gamepads, and pedals." It's activated by pressing the trigger on
the device you want to use - no manual switching involved. They also
say you can connect up to four switchboxes together, giving you up to 13
devices available with the press of a button. They also do not recommend
using digital devices but do not indicate that it *won't* work - just not
recommended. Picture.
PRODUCT NO
LONGER AVAILABLE! PLEASE EMAIL
IF YOU HAVE ANY INFO!
 Alphadactyl.com
offers a product called the Joynet Gameport Hub. It connects digital
or analog joysticks, gamepads, and controllers to your PC. Useful for two
player, three player, and four player games. Works with analog and digital
controllers. Has been tested with MS-Sidewinder game controllers.
Reviews
linked off their web site.
Alphadactyl.com
offers a product called the Joynet Gameport Hub. It connects digital
or analog joysticks, gamepads, and controllers to your PC. Useful for two
player, three player, and four player games. Works with analog and digital
controllers. Has been tested with MS-Sidewinder game controllers.
Reviews
linked off their web site.
Stephan Hans (yet again!) has a circuit
on his web page you can build that does the same thing, switching between
the joysticks by holding down the first button on the joystick you wish
to activate. The best part about this one is the cost :)
Michael pointed out to me a joystick interface card produced by a company
called PDPI. They have a product called the Lightning
4 (L4) (NOTE: New link to Act Labs who now sells the interface)
that allows up to 4 analog joysticks to be connected at the same time.
Two highlights from Michael's message are that it's 1) relatively inexpensive
(New price! About $73 with all 4 ports enabled), and 2) speedy -
less delay on his controls with 4 joysticks than with 1 joystick into his
sound card's game port. I'll let him tell it in his own words:
"I took a look at the controls section
of your web site. I see several ways to interface controls to the computer
but none of them seem to allow 4 analog inputs except maybe the Happ Controls
USB interface. I looked at the price and it is TOO expensive for me($160).
I had already bought and dearly love the L4 Digital game card by PDPI (www.pdpi.net).
It was about $112 with the added bracket for the other 2 gameports. This
lets me use 4 analog joysticks all at the same time!! This is not some
"split" gameport card but it has 4 full fledged gameports. I currently
use 4 - PC Arcade Pros by Interact(6 button joystick pads) all at once.
They were cheap($20) at CompUSA. My joysticks also have individual autofire(2-speed
settings) on each of the buttons. Also there is no slow down when reading
all of the joysticks when connected to the L4. In fact, it takes far less
cpu time to read all 4 of my joysticks on the L4 than having just one of
them connected to my Soundblaster AWE64. I really think you should add
this card to your page. The card does NOT like "digital" type controls
though. If you want 4 analog joystick inputs then this is the card to get.
If you do put it up on your page can you put that it was recommended by
'Just Michael'. Thanks.
According to their web site, you can add
a second interface for up to *8* players at once! The price
on their site is currently $25.00 off, don't know how long that price is
good for. They have a technical page that explains why their interface
is faster than standard game ports. Compatible with DirectX and backwardsly
compatible with DOS apps written for standard game ports.
Sounds great! Thanks Michael!
Holger Isenberg has a web
page featuring a build-it-yourself Digital Joystick-Interface for
the PC-Gameport. "This interface connects two Digital Joysticks to
a standard 15-pin Analog Gameport-Connector. An additional analog port
is built in to switch between the analog and digital joysticks without
unplugging them." There's essentially no writeup, just the circuit
diagrams. This is one for the electronics buffs.
Got an email from a fellow named Dave Johnson, about a fairly simple and
extremely cheap (5 cents per joystick!) circuit
he created to interface joysticks to the PC game port. Thanks Dave!
Mouse
Port
Introduction
The mouse port is used for a variety
of "turning" types of devices - spinners, trackballs, and steering wheels.
There are two possibilities, using the PS/2 Mouse port, and using the serial
port. Some interfaces exist such as the Hagstrom KE72T, but it turn
connects to the PS/2 port so it's really just the two - ps/2 and serial.
With Windows95, you can use both ports at once for mouse control, meaning
you can have up to 4 axis controls at once - two X controls and 2 Y controls.
See spinners and trackballs on the controls
page for more info. Another good idea would be to use a serial
or PS/2 splitter to have multiple inputs on a single port.
Using
two mice
There are a variety of ways to use
two mice interfaces:
-
With Windows 9x, adding two mouse devices
is relatively easy. Make sure you're using the default Windows mouse
driver. Install and verify your PS/2 mouse device works. Then
hook up the second mouse device to the serial port. Windows will
not automatically detect it. Go to the control panel, add new hardware,
and have it search for new devices. Now it will detect the serial
mouse device, and voila - both mouse devices will function at the same
time (albeit controlling the same cursor).
-
In a similar fashion, certain Logitech
mouse drivers will support two pointing devices.
-
Finally, if you are intending to use two
mouse devices in MAME, there's a special version designed by Andy Geeze
called Optimame with internal support for two pointing devices. This
has now been incorporated into Advanced
MAME, and OptiMAME is no longer being actively worked on.
-
There is a mouse
driver on the downloads page supplied by a visitor to BYOAC, that has
the ability to support dual mice - one serial, one PS/2. The command
line is "MOUSE NOINI DUAL" (the driver uses the INI file made the 1st time
and then ignores all the other parameters after). The two mice will be
simultaneously active. However, it will not work with a Intellimouse
on a serial port converter.
-
You can also look for a mouse splitter.
Hagstrom's
mouse encoder
Hagstrom
has done it again! Check out the new ME4 encoder, a trackball and
spinner ps/2 mouse interface! This is a 2" by 2.5" module with support
for a single axis input from spinner, dual axis input from trackball, and
3 mouse button support. The trackball controls both X and Y axis
obviously, and the spinner can be jumper selected to control either the
X or Y axis. The signal is merged electronically her the X or Y axis.
The signal ir and trackball are active at the same time - no more having
to swap cables around or rigging your own merge. Either the X or
Y axis, or both, can be jumper set to be in reverse (handy if your application
and the spinner/trackball don't agree on left and right). The encoder
also supports a "Resolution Input" feature -- either set to always providing
maximum possible movement for the trackball/spinner inputs, *or* set to
allow the resolution adjustment to be made by PS/2 mouse drivers that support
that (most MS drivers).
Not mentioned by Hagstrom, but I see
no reason why you couldn't take the trackball interface with X and Y axis
support, and instead use the encoder for two spinner support, assuming
your application supports it. The Happ Controls style interface that
this encoder supports works the same for both spinners and trackballs.
There are three accessories you might
need for the ME4 -- a male/male ps/2 6 foot cable from ME4 to PS/2 port,
the ME4 to Happ Trackball cable (3 foot), and the ME4 to Happ spinner cable,
(3 foot).
The ME4 is going to cost somewhere
around $40, and should be available very soon (I have a prototype).
There is presently no information on their web site on the encoder.
The
OptiPac
The creator of the I-PAC
interface has another product called the Opti-Pac
Plus. The Opti-Pac Plus handles 2 trackballs and up to 4
spinners. It has an auto-switch feature which allows trackballs and spinners
to be mounted on the same control panel without interfering with each other.
It can support one or two serial ports in several modes, allowing either
standard MAME or EMU+
to be used in two-player trackball mode using both serial ports. It is
universal and can handle Happ and other makes of trackball, spinner or
rotary joystick. It also handles two mouse buttons per port. The board
matches the I-PAC in size and has a similar type of screw connections for
all the wiring.
The board comes with cables for Happ
style trackballs/spinners, which will also work with the Fultra
Spinner.
The cost? $39 plus shipping,
includes cable for power from I-PAC, and two serial cables (9 pin).
Excellent!
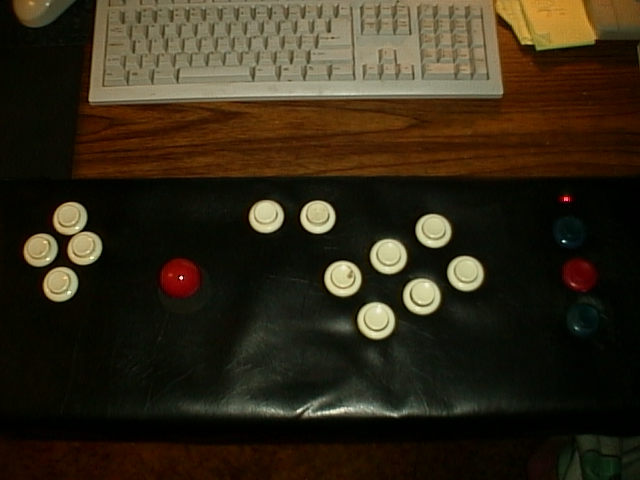
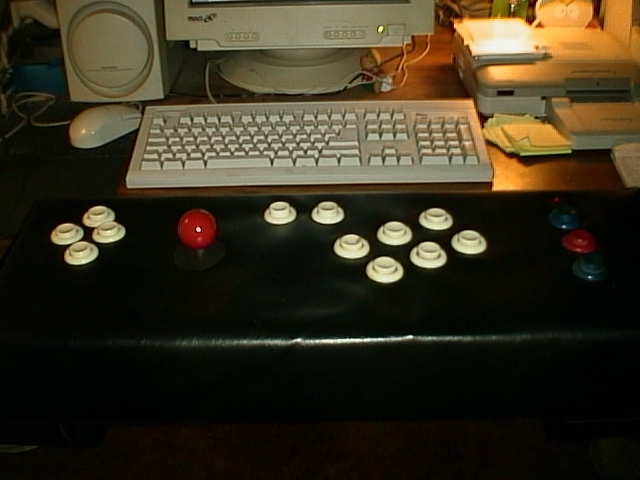
Keyboard
Port - Hacking a keyboard
The most hard core folks seem to be going with the keyboard port for interfacing
their controls to. This allows the highest number of inputs (more than
100 controls possible). This is the route I've taken. To maintain
use of your computer with a keyboard hack, use a keyboard
splitter of some kind.
Wiring your controls to a keyboard
is a bit complex. It is impractical to wire directly to the individual
keyboard keys for a variety of reasons. The way most keyboards seem to
work is via a matrix -- There's a set of wiring going to one side of the
matrix (call it the X axis) and another to the other side (Y axis). If
you had 10 wires on the X axis, and 10 on the Y, you have a 10 x 10 matrix,
with 100 possible key combinations (just about every keyboard has a unique
matrix - to use this technique, you'll have to experiment with your keyboard).
For instance, in this example, keys "Q", "A", and "Z" all hook up to the
X1 wire. The "Q" key also hooks up to the Y1 wire. "A" hooks up to Y2,
and "Z" hooks up to Y3. When you push the "Q" button, it completes a circuit
from X1 to Y1. The keyboard controller chip recognizes that as the "Q"
button and sends a Q to the computer. Now, using this, instead of wiring
our button directly to the "Q" on the keyboard, we wire our "Q" arcade
button to X1 and Y1. To get a "A", we wire up our "A" button to X1 and
Y2. This is a bit confusing - the best bet is to open up a keyboard and
inspect how it works. Stephan Hans' page
has a better explanation of this. My dream
machine page has information and pictures of my keyboard input
setup. Shadow has a complete document
on building arcade controls, and discusses the matrix there as well (worth
a read).
David
passed on to me a piece of
software
he wrote that displays the keystroke on your screen as you make the connection
on the keyboard interface - *excellent* for mapping out your matrix.
He wrote his own because he couldn't find one that showed you all the keystrokes,
such as displaying the grey extended keys. He's given the ok
to share this with everyone here - very much appreciated!
Digital
Genesis Technologies has written another keyboard mapping utility
for testing keyboard matrixes and has passed the information on for us
to share. It can be found on their web
page, or on my downloads
page. Much appreciated guys!
Tony DeCosa, another regular at
Dave's
Classics, has produced a step-by-step document on how he created
his system called the "Joy of Joys Keyboard." It's a very well done
guide documenting how to interface a game pad controller to the keyboard,
and how to use arcade controls with his setup. For the ambitious,
you can even mount ports in the back of your keyboard to plug your gamepads
directly into your keyboard. DeCosa does not have a web site, but
he has given me permission to quote from his guide entirely. It is
linked to here
but was converted from MS-Word to HTML by MS-Word's converter, so may look
a bit icky. You can also download the original zipped MS-Word version
here.
Dragon's Den has a tutorial
on doing a keyboard hack, and there's an excellent section at EmuAdvice
called Keyboard Hack Info.
Keyboard
Port - Keyboard Encoders
A Keyboard
Encoder is a device that sits between your computer's keyboard input and
whatever device you devise, for instance arcade push-buttons. There are
now several vendors selling encoders suitable for use in arcade projects.
Hagstrom
Electronics
Hagstrom
Electronics is one of the biggest companies in the arena, offering
a variety of products for doing this. Hagstrom links in this section:
Click to learn about . . .
| KE-18
encoder |
18 inputs, up
to a 9 x 9 matrix for 81 inputs. |
| KE-24
encoder |
24 inputs, programmable
via keyboard or rs-232 port, up to 12 x 12 matrix for 144 inputs. |
| LP-24
encoder |
24 inputs, programmable
via keyboard only, up to 12 x 12 matrix for 144 inputs. |
| KE-72
encoder |
72 distinct
inputs, programmable, no matrix but no ghosting, trackball support.
The ultimate gamer's interface! |
| Daisy-chaining |
What about daisy-chaining
two encoders together for more inputs? |
| How-to |
How exactly
does on use a Hagstrom encoder? |
KE-18
& KE-24
Using one of these encoders appears
to me to be a very efficient method. The KE18 offers either 18 inputs,
or a 9 by 9 matrix, depending on how you wish to configure it. The
KE24 offers either 24 inputs, or up to a 12 by 12 matrix,
and it
is programmable via an onboard rs232 port with the software they supply.
Using this product would presumably allow you to have multiple configurations
for different gaming applications, loadable with a minimum of fuss. Also,
since you are directly accessing the controller, you don't need to worry
as much about the ghosting
effect. It won't totally solve the problem for you however - see
the
Technical page
for more. The folks on the phone were very nice - the KE18 costs
$44.95, and the KE24 costs $99.95. --- Thanks to SpyHunter for the
input on this one!
A couple of folks have pointed out
that Hagstrom sells both a standard speed and a high speed version of their
various encoders - you have to ask for the high speed version specifically.
To
make sure you get the faster model of the KE-24 with the on-the-fly reconfiguration
capability (vs. having to shutdown/restart) specify the KE24-FAST
model.
Asked Hagstrom about the difference
between the two chips as regards to programming - their answer:
The "on-the-fly" loading is accomplished
without the use of the programming jumper. The IC on the KE24 must
show a version number of V - 110181 or higher (ex:V - 110182 ....).
This version requires our KE24CFG program (included with the unit) version
5.1 or higher. Note that an errant KE24 setup could prevent the unit
from responding to the "on-the-fly" programming, so the jumper will still
work to force the KE24 into program mode regardless of the configuration.
We still include the jumper with the unit just in case the user has entered
an incorrect configuration (same pin defined as a row and a column, for
example).
ALSO - Hagstrom is now selling
a connecter that connects at the I/O header and terminates with leads that
you can attach to a barrier switch for easy connect/disconnect.
LP-24
Got an email on another encoder Hagstrom
sells - the LP24. "It is cheaper than the KE24 and is a more compact
unit without the RS232 port. It can be programmed through the keboard
port (utility included) and has a keyboard passthrough. It can be
configured to custom matrix sizes to scan from 23x1 to 12x12 arrays."
The LP24 sells for $79.00. John also described how he intended to
use the encoder, to help him practically eliminate ghosting problems without
the use of diodes. From his email:
"It can be configured to custom matrix
sizes to scan from 23x1 to 12x12 arrays. At the moment I am playing
with a 22x2 array design with almost no chance of ghosting.
| |
1 |
2 |
3 |
4 |
5 |
6 |
7 |
8 |
9 |
10 |
11 |
12 |
13 |
14 |
15 |
16 |
17 |
18 |
19 |
20 |
21 |
22 |
| A |
U1 |
L1 |
11 |
21 |
31 |
41 |
51 |
61 |
U2 |
L2 |
12 |
22 |
32 |
42 |
52 |
62 |
P1 |
P2 |
C1 |
C2 |
RST |
PAU |
| B |
D1 |
R1 |
|
|
|
|
|
|
D2 |
R2 |
|
|
|
|
|
|
TAB |
~ |
ENT |
ESC |
|
|
This allows 2 players with 6 buttons each with
most/all of the important keys for MAME.
Since joysticks cannot be up and down at the
same time (or left and right) there is no chance of ghosting when these
are assigned to the same column. The only chance of ghosting occurs
when:
C1/ENT,
C2/ESC,
P1/TAB,
P2/~
are pressed at the same time while holding
a joystick off-center (should not happen durring gameplay).
-all of this and no diodes! (of course you
could buy a lot of diodes for $79.95)"
KE72
Hagstrom came out with an encoder tailor made
for the arcade controls community called the KE72 and the KE72T.
This fabulous encoder has it's own
page.
Daisy
Chaining Hagstrom Encoders
Contacted Hagstrom to ask about daisy-chaining
the encoders (The LP-24, KE-18, or KE-24) (for instance for 48 inputs without
a matrix, or (yipes!) up to 288 total?) and what impact this would have.
Short answer: It should work with some caveats - long answer follows:
Thanks for your email. The units
may be daisychained, but caution should be used in limiting the total cable
distance measured from the PC to the last unit to about 10 feet.
With standard cables, the voltage will drop slightly from one unit to the
next (a function of the wire size in the cable, and the current consumption
of the encoder and PC keyboard, if attached). As a recommendation,
I would suggest no more than two units chained together. Longer runs
of wire will drop the 5V level low enough to indicate a "brown-out" condition
to the encoder, and cause a reset.
One thing to bear in mind is that
programming encoders that are daisy-chained becomes problematic.
They cannot be addressed as one unit, so you'll need to either have two
serial ports connected to the two KE-24's, or realize you can only program
one LP24 at a time as the "upstream" LP24 cannot be programmed via the
keyboard interface. Presumably you would have to program each one
at a time then daisy-chain them. This could be a headache if it was
buried within a cabinet.
Once again I'm impressed by Hagstrom's
quick and helpful responses to my questions.
How
to use a Hagstrom Encoder
After several questions from people
asking how exactly to use the Hagstrom keyboard encoders, I asked for help
from those who had done it. I received several responses, which I
really appreciate. The easiest explanation came from the folks at
Arcade Solutions. Their well done writeup is on a separate
page.
I-PAC
Andy Warne sells
a keyboard encoder type of interface called the I-PAC
(Interface for PC to Arcade Controls). "The I-PAC is a small board
which allows connection of arcade controls such as buttons and joysticks
to a keyboard port on a PC motherboard. It was designed to use inside an
arcade cabinet with the PC board also mounted inside. It was designed so
that a normal keyboard would only be needed for game loading and configuration,
not for gameplay." It has both a USB and keyboard connector.
It runs $47 which includes the interface, cable, shipping and US-AUS currency
exchange. It has some special functionality designed for emulator
support - visit his web site to read all about it :) This has proven
to be one of the most popular choices so far.
MasterPilot
by QuickShot
Roy Masters passed along
an interesting product he found, by a company called
QuickShot.
Built for Flight-Sim enthusiasts, it's a keyboard-passthru product called
MasterPilot. From Roy's email:
This equipment is designed
for Flight Sim enthusiasts connects in line with the keyboard to provide
a control console with all the features (keypresses) required for a specific
game stored on a ROM cartridge. The Programmer provides some software
and a User Configurable Cartridge into which your keystrokes can be programmed
and changed when necessary. The Masterpilot itself I have dismantled
to investigate and should be relatively easy to hack. It seems to
work like a keyboard encoder and has a ribon cable connecting the 24 main
buttons to the controller electronics. The advantage of using this
system is that you can assign shifted values to any of these 24 keys, and
reprogram the keypress (or key combinations) they transmit to the software,
stroe the information in multiple cartridges and easily reconfigure your
arcade controls for different games or emulators. The programmable
cartridge holds five sets of key settings.
Thanks Roy!
Audon
Electronics KBE-1
Audon
Electronics sells the KBE-1
Keyboard Encoder. It's a non-programmable keyboard encoder
with a keyboard passthrough, 102 keys in a 16 x 8 matrix. Think of
it as a keyboard hack, with the matrix already set out for you and a keyboard
pass through meaning no need for a keyboard splitter! When I asked
them about ghosting, they replied:
Ghosting
- the kbe-1 does not suffer from any ghosting problems. It also has a 16
key buffer, so that upto 16 keys can be pressed at the same time, and each
key code will be sent to the PC sequentially.
They
sell it for UK £54, shipping to the US for £12.
Vetra
Encoders
Vetra
has a whole range of keyboard encoders available with a variety of capabilities.
They have the SmartWye
series (non-programmable) ranging from $50 to $130, the SoftWye
series (programmable) for $99, and good news for Mac folks, the McEncoder
series for $90. Feedback
from anyone dealing with them welcome!
ButtonBox
The ButtonBox
is a build-it-yourself keyboard encoder with the following features:
-
Can be used in Direct or
Matrix mode.
-
Up to 27 buttons can be
connected in Direct mode.
-
Up to 64 buttons can be
connected in Matrix mode (8x8 matrix).
-
Switch between Direct and
Matrix mode "on the fly" (without reboot).
-
No "ghosting/masking key"
problems in either Direct or Matrix mode.
-
Which button sends which
keystroke is configurable from the PC using a configuration program (not
available yet).
-
Any errors encountered in
the ButtonBox are displayed on a LED.
-
No external power needed,
it uses power from the keyboard interface.
The web site has
hardware instructions, software to program it, and other info related to
the encoder. Looks great - anyone building this please let
me know!
Druin's
SNK LS30 Rotary Joystick to MAME Interface
Druin has put together
an interface
allowing the use of the rotary style joysticks used in games like Ikari
Warriors. From the web site:
In short, the interface
described here connects to either one or two 12 position rotary switch
joysticks (LS30 SNK or HAPP Ikari type with the 13 pin cable) and
also connects to a keyboard encoder to directly replace arcade button switches
that would be wired to the MAME dial/twist keystrokes. It connects
to any working keyboard encoder just as an arcade button would, and it
automatically presses rotate left and rotate right buttons for player 1
and player 2, based on the detected joystick shaft rotations.
Dr. D wrote up a
review
of one of these interfaces. Looks great!
Ron's
MK40 & MK64 keyboard encoders
Ron, known in the arcade
community for hosting pages on Gauntlet arcade game hacks, has put together
a couple of keyboard
encoders for folks on this side of the hobby. Both sport
similar features, one with 40 inputs, one with 64. The feature list
below is lifted from Ron's page:
-
40 single wire dedicated
digital inputs on MK40, 64 inputs on the MK64.
-
No interference between
inputs. (No Matrix)
-
Can generate an alternate
key set on seven of the inputs when when the "shift" key is held down.
-
Each input can be mapped
to almost any key and can be changed at any time by software. Key
map is stored in EEPROM rated for 1,000,000 erase / write cycles.
-
Programs through the keyboard
port, no extra serial port required.
-
Three dedicated LED outputs
that are used in some games (Num Lock, Caps Lock, & Scroll Lock).
-
It plugs in between your
computer and an optional keyboard via PS2 (6 pin mini-din)connectors (included).
-
Supports full bi-directional
communication with optional keyboard.
-
Compact PCB that is less
than 2" x 6", small enough to be mounted to the control panel.
-
Capable of identifying which
control panel is installed (If you have more than one).
-
A male to male 6 foot PS2
cable, four mounting screws and spacers are included.
The encoders can
be daisy-chained, with the same considerations as the Hagstrom encoders
(can only program the first one, possible voltage drops...). The
cost of the MK40 is $53, the MK64 is $63, add $6 shipping to either.
There is a 30 day money back guarantee, and a 90 day warranty. It
looks great, read a review here.
 Wiring
kits are also now
available!
Wiring
kits are also now
available!
The
KeyWiz
The KeyWiz is
the brainchild of RandyT, another regular on the message forums here at
BYOAC. Currently there are three models available, the Eco
(Economy model), the standard,
and the max.
All 3 support the same core set of features. See their links for
further details on the differences. This page is due for a huge revamping,
so for now I am going to cut and paste from their web site...
Standard KeyWiz Features:
-
32 direct input lines.
No Matrix means No Blocking, No Phantom Keys and no variable delays.
All inputs are given equal priority and speed.
-
12mhz Processor. Fast
RISC based microcontroller. The proprietary KeyWiz firmware is coded
in 100% pure Machine Language for blinding speed!
-
Custom, State-Based De-bounce
Code. Keys are sent the moment the inputs have stabilized.
No time delays!
-
The Shazaaam! Key.
Like the shift key on a keyboard, the Shazaaam! Key lets 24 of your buttons
have an alternate key assignment. The Shazaaam! Key does not take
away an input, so all 32 inputs are always available for use. Another
unique Shazaaam! feature is that, with an additional low-cost adapter,
any switch can be modified to send a code from the alternate set with a
single button press! This means you can have up to 24 additional
switches for secondary functions, and still have all 32 inputs available
for primary controls.
-
Fully Programmable.
All 32 normal and 24 Shazaaam! key definitions can be configured through
the custom codeset to suit your application.
-
Jumperless Operation.
The Custom codeset can be uploaded at any time, with no re-configuration
of the hardware required.
-
On-The-Fly Codeset Switching.
Just hold down the Shazaaam! Key and move control stick 1 left or right
to seamlessly toggle between the default MAME compatible keycode assignments
and the custom keycode set.
-
Whopping 72 Character Circular
Buffer. Gives KeyWiz the highest reliability and maximum throughput
capabilities without "stuck" or "missed" keys. Also allows KeyWiz
to pass the grueling "Single Button Test."
-
MAME Ready Right-Out-Of-The-Box.
By popular demand, the KeyWiz firmware-default codeset has been made compatible
with MAME defaults and includes other useful regular and Shazaaam! Key
definitions (Custom firmware-default keycode definitions can be supplied
for specialized applications. Contact us for more information).
-
Fully Interrupt Driven.
The key processing begins the instant activity is sensed on ANY input.
-
Full-featured Custom Codeset
Management Software. Completely mouse/trackball driven. One-click
selection of any of 15 user definable codesets (32 normal and 24 Shazaaam!
codes per). Codeset to be active after programming is user-selectable.
Command line options for autoprogramming / batch file operation.
Screenshots are available here.
-
OS independant. The
default MAME-compatible keycode definitions are stored in firmware and
are available immediately upon power-up. This means KeyWiz can be
used with any OS and requires no drivers. The PC thinks the KeyWiz
is a standard PS/2 keyboard, but the KeyWiz knows that it is much better
:).
-
Small Footprint. 2.1
x 3.2 inches. Large enough for easy connections, but small enough
to mount just about anywhere.
-
36 Connection Points Available
on the PCB. 32 inputs, 2 grounds, 1 Shazaaam! Key, and a +5v connection.
-
Completely PS/2 Port Powered.
No external power source necessary.
Keyboard
Port - Other
PowerRamp
- Act Labs made a keyboard port arcade style joystick that is discussed
elsewhere in the FAQ (alternatives, reviews). It leaves a bit to
be desired in and of itself, but it seems to make an excellent interface
for custom controls. I've put up a separate
page for it. NO
LONGER AVAILABLE!
Keyboard
Ghosting & Blocking
|
One potential problem with keyboard
controls - whether using a hack or an encoder - is "ghosting" - where pushing
several keys at once produces a "ghost" key that wasn't in fact pressed.
For instance, using the matrix example from below, we have "Q" = X1-Y1,
"A" = X1-Y2, and "Z" = X1-Y3. Suppose as well that "W" = X2-Y1, and "S"
= X2-Y2 (see Example Matrix below). If you push "Q", "W", and "S" at the
same time, you're pressing X1,Y1,X2,Y2, which would give you "Q" X1Y1,
"S" X2Y2, "W" X2Y1, but also "A" because of X1Y2 being connected. (Note
- electronics is not my strong point. My specifics may be in error, but
the general concept being illustrated is correct.) This could be a problem
if, for instance, your fire and movement keys ended up also producing the
"quit" key. The way around this is to find a set of keyboard controls that
you will use that don't cause ghosting, or that cause ghosting of keystrokes
that have no affect, or to use diodes to prevent the affect. Read
on for more info... |
Example Matrix
| X/Y |
X1 |
X2 |
X3 |
... X10 |
| Y1 |
Q |
W |
... |
... |
| Y2 |
A |
S |
... |
... |
| Y3 |
Z |
... |
... |
... |
| ... Y10 |
... |
... |
... |
... |
|
Q + W + S = QWSA
|
|
RetroSTIK's creator Brent Geery
has been championing a solution to this problem that makes one smack oneself
on the forehead and say, "Duh!" He suggested using diodes along your
matrix to prevent paths of electrical connection that are undesired. |
|
Part II. Unexpectedly, the use
of diodes became such a contested point that it merits its own
page. Several voices weigh
in on one one side or another - a must read if you are going the keyboard
hack route. |
|
Part III. John sent
me an email detailing his use of the LP24 keyboard encoder from Hagstrom.
With the matrix he planned out, he should have almost (but not 100% guaranteed)
freedom from ghosting, without diodes. Read the details
above! |
|
Part IV! Check
out the write up on Hagstrom
keyboard encoders by Arcade
Solutions. There's a section in it about techniques to defeat
ghosting when using the encoder in matrix mode. |
|
Part V! Bugfinder
has written up a page
hosted at KillerClown's
arcade that details keyboard hacks supporting up to 16 keystrokes
without the ghosting problem. He lists 4 varying configurations and
the keyboard model he used. Worth a look if you're going the keyboard
hack route. |
|
Part VII! Be sure
also to check out Dave
Dribin's page for a much clearer explanation of ghosting and solutions. |
|
Part VIII! Marshall
Brooks over at Mameworld'sEmuadvice
has a section called Keyboard
Hack Info that is a must visit. More details on doing a keyboard
hack, and discussion on the ghosting issue. |
|
The flip side of ghosting
is keyboard blocking. It's based on similar roots as keyboard ghosting,
but it has the opposite affect. Push down several keys, then attempt
to push another before you let go of the first ones -- often, the last
keystroke won't show - it's being "blocked" by the other keys. Both
keyboard ghosting and blocking should be tested for before using a particular
layout for your keyboard hack. |
Parallel/Serial
ports
This
section has been due for an update for a bit now. It used to start
with "There isn't too much information on this one yet." Tormod Tjaberg
took me to task on this one :) He has a good writeup/download on
interfacing digital joysticks to the parallel port. Look for the
Digijoy
link on his
homepage.
Tormod's .txt file that is included in his download is now available online
here.
This is a must-read if you are intending to go this route!
Many
of the do it yourself projects found in the alternatives
section for hooking up game console gamepads use parallel port interfaces.
Also, Benji York has updated his Sneskey
software and now supports interfacing custom arcade controls, not just
console gamepads. I've put a writeup on using SNESKEY for arcade
controls on a separate page.
See alternatives section for more details on Sneskey! There is also
a somewhat dead
page (last update November 97) that was starting to collect information
on interfacing arcade controls via parallel and serial ports.
Happ
Controls Control Interface Board (serial)
- From the Happ
Controls web site: "The Happ Control Interface Development
Kit contains everything needed to provide an interface between any Happ
Controls input device (joystick, button, trackball, steering wheel, etc.)
and a PC. . . . The kit contains a PCB, power supply, demo and debug software,
software drivers and all the necessary cables and documentation to get
you going." There are two drivers supplied - one is a DOS driver
that would require custom software for any particular game (essentially
useless if you aren't designing the game software yourself), and a Windows
Direct X driver. The Windows Direct X driver will make whatever device
is plugged into this interface show up as a joystick to Win95 (WinNT?),
allowing any game that supports Windows Direct X to use the controls.
Thanks to ACL for this one! Be sure to also check out the USB
interface!
Steffen
has had a page up for some time now called How
to make a joystick adapter for the PC parallel port. It details
how to interface up to 7 joysticks via the parallel port adapter.
His adapter is supported by DirectPad
Pro, Linux,
and the PCE TG16 emulator.
Y
adapters
All
the various interface methods here work great, but share a common problem.
A typical setup might have the joysticks and buttons on the keyboard, and
a spinner and trackball on the ps/2 and serial ports. What do you
do, however, if you still want to use your keyboard and mouse on the computer?
What if you wanted more than one trackball or spinner (although presently
that's not too useful as they all control the same pointer)? In this
case, there are a variety of adapters you can build or buy to put multiple
devices on a single port.
SERIAL PORT
-
Stephan
Hans has devised a splitter
circuit for the serial port.
This circuit splits the power from the serial port and does not require
external power. Stephan indicates that although the devices he tested
worked fine, it's possible that a particular device may not get enough
power with his circuit. Only one device is active at a time, switching
automatically after a second or two of motion (to prevent accidental switching).
-
A commercial device called "Y-mouse"
is made by a company called P.I.
Engineering. It uses a keyboard
passthrough adapter to obtain power for the adapter. Should that
not be feasible, a stand-alone AC adapter can be purchased for about $24.
The Y-Mouse can be daisy-chained for even more serial devices. Only
one device is active at a time, switched automatically when it is used.
It runs between $45 to $50 dollars.
KEYBOARD PORT
-
Thanks to Stephan
Hans, there is a simple to build
circuit
that will split the keyboard port so that you can use one keyboard for
arcade controls, and another for actual keyboard use.
-
From "EVERYDAY PRACTICAL ELECTRONICS"
July 1997, this circuit
also splits keyboards. It's a simpler circuit to build, but has several
drawbacks that Stephan's circuit doesn't have. Thanks to Ian Ness
for the email!
-
If you don't want to wire your own,
the folks who make the Y-Mouse above also make the Y-Key
Key. It does not require an external power source.
It's available from the same folks above for a similar price.
-
Vetra also sells a splitter calls
the Smart
Splice, but it's $180. They
have other models that allow more than 2 keyboards at one time, for a lot
of money.
PS/2 PORT
-
So far, there has been no success
on the splitting the PS/2 port with a build-your-own circuit.
-
The Y-Mouse and Y-Key Key folks
also make a PS/2 Y-Mouse.
It does not require an external power source, and is daisy-chainable.
Same locations and pricing.
-
Vetra also sells a splitter calls
the Mice
Splice, also $180. They have
other models that allow more than 2 at one time, for an insance amount
of money.
PS/2 PORT to USB PORT
-
A very interesting item
is the Y-Mouse
PS/2 to USB adapter from P.I.
Engineering. It allows you to plug two PS/2 devices into
your USB port. Aside from not tying up your PS/2 port, it has some
intriguing possibilities for people wanting hot-swappable arcade controls.
Done with your trackball? Swap it out for the spinner, without having
to power on/off (which you'd have to do if you were using a PS/2 port).
It
does not require an external power source, and is daisy-chainable.
-
The other interesting item from
these folks is the Y-Mouse
PS/2 to USB (iMac) adapter.
It does the same thing as above, but allows Mac folks to use PS/2 input
devices! I'd love to hear
from anyone who tries this!
UK Availability
Looking
for one of the several Y-mouse and related adapters from P.I. Engineering
in the UK? Check out Steadland's
International, who have passed on their pricing to me:
-
Mouse
adaptors
GBP46.70 + VAT
(WHYM-0001
Dual Serial and WHYM-0002 Dual PS/2)
-
Keyboard
adaptors GBP46.70 + VAT
(WHYM-0004
Y-Key Key)
-
Monitor
adaptors
GBP65.00+ VAT
(WHYM-0006
Y-See Two)
GBP
= Great British Pounds Sterling, but if you're in the UK you probably knew
that :) Prices include shipping, discounts for volume, shipping to
rest of Europe slightly higher.
Other
methods
EPIC - Johnxt sent me a link to R&R
Electronics, who sells a product called the EPIC. It is a
controller interface that appears to be the interface of choice for the
build-your-own-flight-simulator-cockpit crew. The EPIC appears to
be to the Hagstrom encoder what the encoder is to the keyboard hack - i.e.
many levels of sophistication and capability higher! From
their web page:
"What is EPIC?
EPIC is the Extended/Programmable
Input Controller from R&R Electronics. It's an interface card for IBM
PCs and compatibles designed for computer enthusiasts, home cockpit builders,
and specialized analog/digital I/O applications that supports:
-
Sixteen+ analog channels
Compatible with your
existing analog joysticks --- saint
-
300+ buttons
With expansion modules,
up to 1000 buttons!? --- saint
-
Unprecedented programmability
EPL - Epic Programming
Language, keyboard control, analog control, if you can think of it, you
can program it. --- saint
-
Extensive analog configuration
and management
Convert joystick
movements to keystrokes, more... --- saint
-
Configurable expansion bus
Daisy chain modules
together for additional controls (Who'd need more?) --- saint
-
Complete Compatibility
Compatible with your
existing joysticks --- saint
The EPIC's programming and
configuration is stored in its on-board RAM. No TSR's or device drivers
to muck with. Definitely a product to investigate. Price is
$250 and up (and up and up) depending on configuration.
Thanks Johnxt!
Wiring
|
Wiring
has been moved to it's own page now.
|
--
Home --